 (Image via
Creating a leather belt by hand brings together time-honored techniques and careful attention to detail, resulting in a unique accessory that stands out from mass-produced options. Working with leather allows you to shape every aspect of the belt, from selecting the right piece of material to choosing the buckle and stitching style. Each step invites creativity and requires patience, making the finished product not only functional but also a true reflection of your style. As you complete the belt, you gain a greater understanding and respect for the skill involved in leather working, turning a simple project into a rewarding experience.
Every step in creating your own belt teaches you about quality and attention to detail. Choosing fine leather, preparing your tools, and assembling the piece create a tangible connection between you and the item you wear daily. This rewarding experience offers a mix of creativity and technical challenge that grows as your skills improve.
Choosing the Right Materials
Select materials that promise durability and style as a crucial part of the process. Use quality leather, the appropriate tools, and carefully chosen hardware to lay a strong foundation for your project. The materials directly influence the appearance and lifespan of your creation, so investing time in choosing items that match your design ideas and functional needs makes sense.
Keep these recommendations in mind when shopping for your supplies:
- Full-grain or vegetable-tanned leather for natural beauty and durability
- Premium cutting tools designed for clean, precise cuts
- A leather punch, edge bevelers, and a skiving knife for smooth finishing
- High-quality buckles and rivets to secure and decorate your piece
- Adhesives and stitching supplies to strengthen the structure
Choosing these tools and materials carefully ensures that your project starts with a solid technical base and allows your personal style to come through.
Preparing Your Workspace and Tools
Set up an organized and safe workspace before starting your craft. A clean area boosts your creativity and reduces hazards associated with leather tools. Clear a table, gather all necessary items, and set up proper lighting so you can see every detail throughout your project.
Follow these essential steps to prepare efficiently:
- Clear your workspace of clutter and cover surfaces with a durable cutting mat.
- Check your tools to ensure they are sharp and in good condition.
- Wear safety gear such as gloves and protective eyewear to prevent accidental cuts.
- Organize your materials so that extra leather pieces, adhesives, and hardware are within reach.
Preparing everything thoroughly upfront helps prevent interruptions later, keeping you focused on each precise cut and mark.
Step-by-Step Guide to Crafting Your Leather Belt
The process from raw leather to a finished leather belt involves a series of clear and manageable steps. Measure your waist accurately and mark the leather where you plan to make cuts and holes. Ensuring precision in these early stages guarantees a perfect fit when you wear the belt.
Follow these steps to build your creation:
- Measure and mark the leather to the desired length and width, accounting for the buckle and any design features.
- Cut the leather carefully along your measurements, making sure edges are smooth and even.
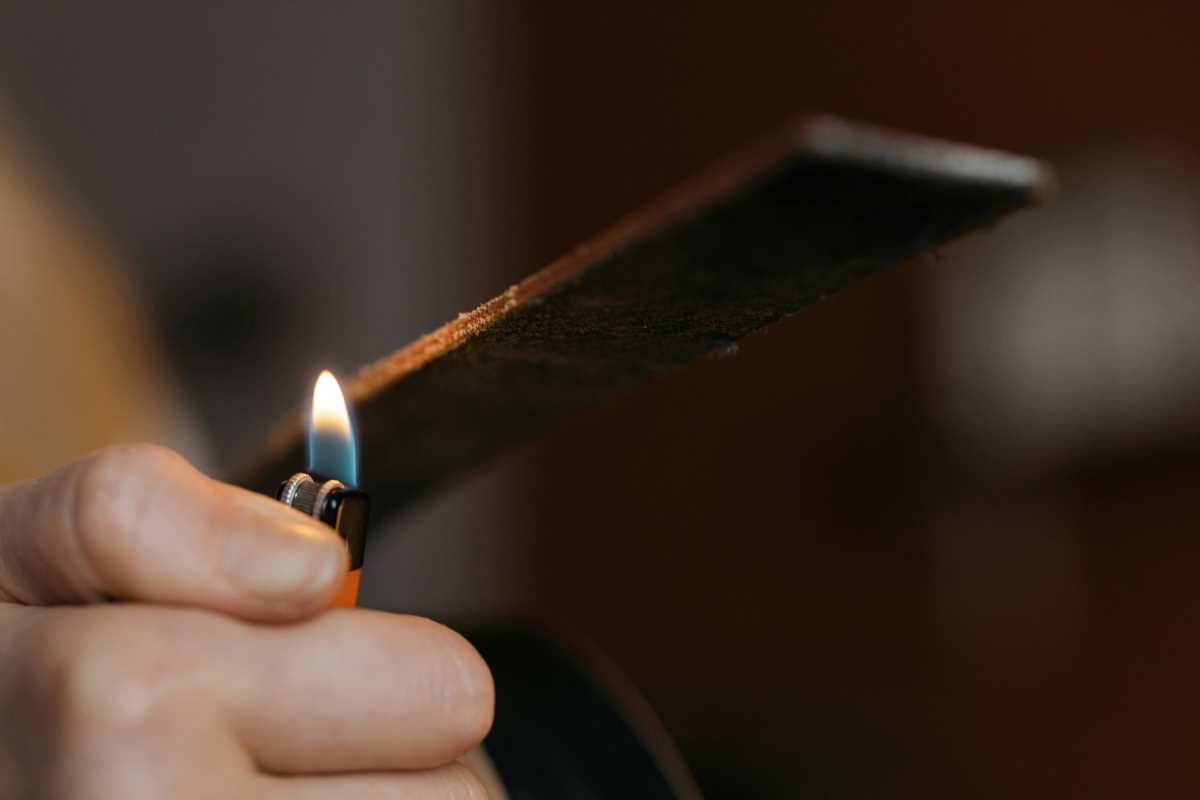
- Skive one edge of the leather to prepare it for joining or to allow healthy flexibility when wrapped around the waist.
- Punch evenly spaced holes to enable proper adjustment, double-checking alignment to keep symmetry.
- Attach the buckle securely by stitching or rivets, making sure all hardware is aligned and tightly fastened.
Following these steps creates a sturdy base that results in a practical accessory and a showcase of your diligence and creative effort.
Adding Personal Touches and Finishing Details
Personal touches turn a well-made belt into a special piece tailored to your style. Use techniques like stamping, dyeing, and edge finishing to add subtle flair. These methods let you modify textures and colors to reflect your personality, elevating the belt beyond a simple accessory into a statement of your craftsmanship.
Try these enhancements to customize your design:
- Stamp emblems or distinctive patterns on the leather to make it uniquely yours.
- Dye the leather to create a rich, uniform color or a gradient for extra character.
- Apply edge finishers to smooth and seal the sides, improving appearance and durability.
Care and Maintenance Tips
Taking care of your handmade belt ensures it stays in good condition and ages gracefully. Regular maintenance prolongs the life of the leather and protects the craftsmanship you put into each stitch and cut. Follow a simple routine to prevent damage.
Use these tips for long-lasting wear:
- Clean your belt gently with a soft cloth to remove dust and dirt after each use.
- Apply a leather conditioner periodically to keep the material supple and prevent cracking.
- Store the belt in a cool, dry place away from direct sunlight to prevent fading and hardening.
- Check the belt regularly for loose stitching or hardware, fixing any issues promptly.
Routine upkeep protects your investment and ensures that every wear highlights the careful craftsmanship you put into your work.
This project brings leatherworking to life with each detailed cut and personalized finish. Enjoy the process and wear your handmade creation with pride.


.jpeg)