 (Image via
Turbochargers and superchargers unlock impressive gains in engine power, but installing them requires careful planning and attention to detail. This comprehensive guide breaks down each step of the process, giving you straightforward instructions and helpful advice along the way. You will find detailed explanations, technical tips, and real examples that show how these upgrades work in actual vehicles. By following these methods, you can upgrade your engine’s performance and enjoy a more responsive driving experience. Whether you are new to forced induction or have some experience, this guide supports your journey to making effective modifications that deliver noticeable results.
Forced induction systems can give your engine a noticeable power increase while offering the thrill of improved driving dynamics. With careful preparation and attention to detail, you can successfully perform these upgrades on your own, saving time and money while getting closer to the heart of automotive performance.
Choosing the Right Forced Induction: Turbo or Supercharger?
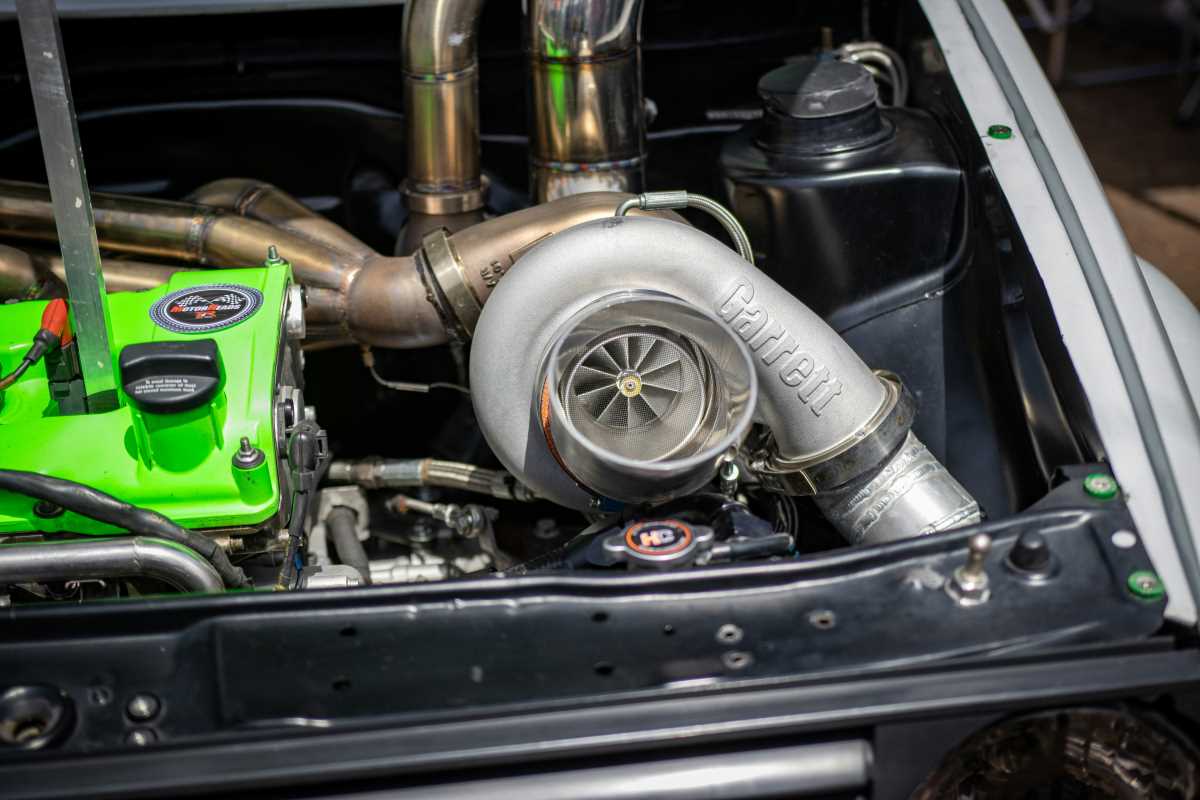
Turbochargers and superchargers both increase engine performance by forcing extra air into the combustion chamber. Each system works in its own unique way to produce a noticeable gain in power. Knowing the differences helps you decide which system best fits your driving style and performance goals.
The following bullet points compare key aspects of turbochargers and superchargers:
- Method of Operation: Turbochargers use exhaust gas energy to spin a turbine, while superchargers are driven directly by the engine belt.
- Power Delivery: Turbochargers provide significant horsepower and efficiency gains after reaching a higher boost threshold, whereas superchargers offer immediate power throughout the RPM range.
- Installation Complexity: Installing turbo systems can involve additional exhaust modifications and intercoolers, while superchargers often need fewer modifications to the engine bay.
- Heat Management: Turbochargers generate more heat due to the exhaust gas usage, so proper cooling systems are crucial. Superchargers may need less elaborate thermal management but still benefit from improved cooling.
Choosing between these two enhancements depends on your vehicle setup and the driving experience you desire. Each system has strengths that suit different performance profiles, and understanding these differences is key to a successful upgrade.
Essential Tools and Preparation
Before starting your installation, gather all the necessary tools to ensure a smooth process. Being well-prepared avoids frustration and delays during your build. Clear pre-installation planning and a full understanding of your vehicle’s layout will save you extra work later on.
Follow the numbered checklist below as you prepare:
- Gather essential tools such as a reliable set of wrenches, screwdrivers, pliers, and automotive jacks.
- Review your vehicle’s service manual to identify specific torque settings and procedures for disassembling parts.
- Ensure you have safety equipment like gloves, goggles, and an appropriate leak detector for fluids.
- Verify that all turbo or supercharger components are compatible with your engine, including custom brackets and piping.
- Prepare a clean work area with ample lighting and space to lay out parts methodically for easy access.
- Read through the manufacturer’s installation instructions to address specific calibration or tuning steps after installation.
Double-check each step in the pre-installation process to start your project on solid ground without unexpected surprises. Taking time for proper organization prevents errors during the build and results in a safer installation environment overall.
Step-by-Step Installation Process
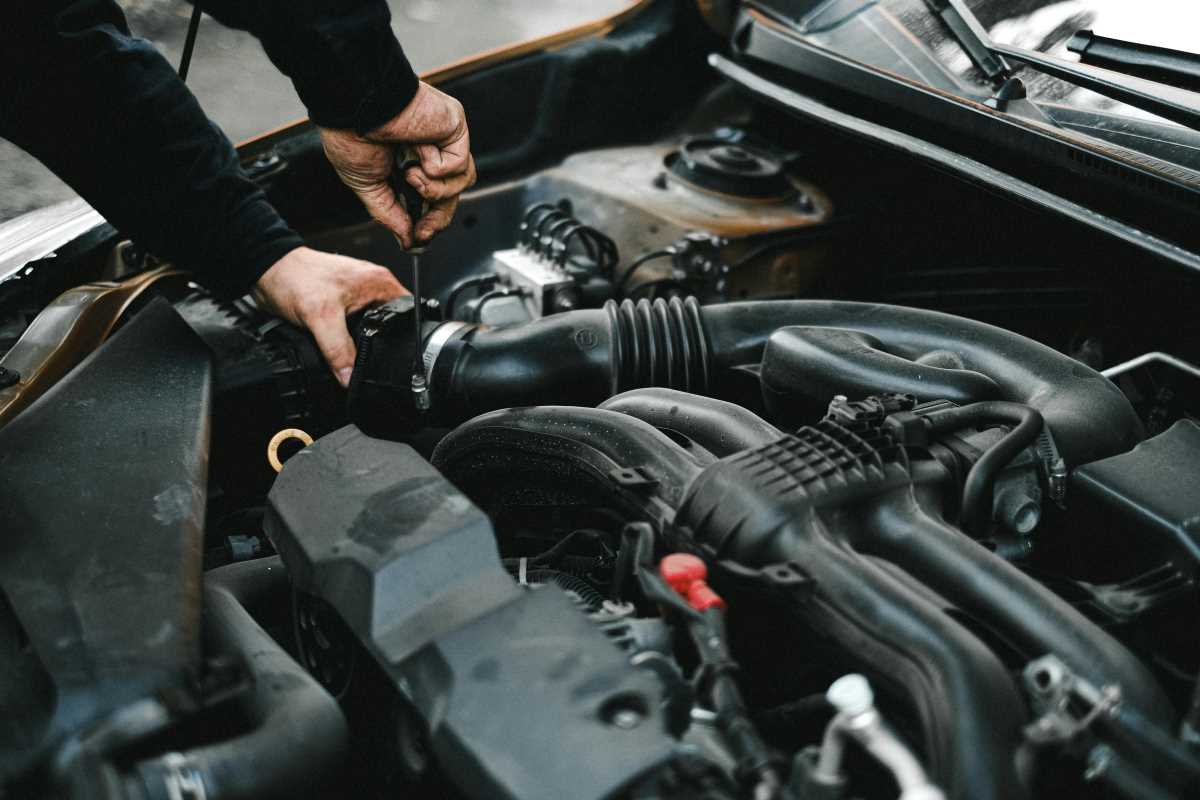
The installation process requires a systematic approach. Begin by carefully removing any parts blocking access to your engine’s air intake. This step clears the space needed for fitting new components and examining the engine bay layout.
Follow these detailed steps to install your turbocharger or supercharger:
- Step 1: Remove necessary components such as the air intake system, engine covers, and any obstacles in the engine compartment. Label bolts and connectors to make reassembly easier.
- Step 2: Place your forced induction unit in position. Ensuring proper alignment is crucial for airflow and connection of plumbing and wiring. Secure it using recommended brackets and follow manufacturer guidelines carefully.
- Step 3: Install necessary piping and intercoolers (if applicable), checking that all connections are leak-proof. Inspect seals and gaskets to ensure they are in excellent condition before tightening all connections.
- Step 4: Connect the turbo or supercharger to your engine’s drivetrain. Route cables and hoses correctly to avoid interference with moving parts. Use high-temperature clamps where needed.
- Step 5: Reprogram the engine management system to recognize the added boost by recalibrating sensors and control modules. Consider professional tuning to maximize performance gains safely.
- Step 6: Secure all wiring, check clearance for the new components, and verify that nothing interferes with engine heat or operational movement.
Common Mistakes and How to Avoid Them
Errors often happen during installation when rushing or overlooking details. A careful approach will help you avoid common pitfalls.
- Failing to complete the pre-installation checklist can lead to misplaced filters, incorrect torque settings, or missing parts.
- Ignoring manufacturer instructions can result in improper alignment or calibration, potentially damaging engine components.
- Neglecting proper heat management might cause premature wear on turbo or supercharger parts and related engine systems.
- Using the wrong tool or method for component removal can cause unintended damage, leading to costly repairs.
Double-check each step and take your time during complex parts of the process. Monitoring every connection ensures small issues do not escalate during operation.
Timing, Testing, and Safety Checks
After completing the installation, adjust and test your turbocharger or supercharger upgrade carefully. Fine-tune settings to balance performance and engine safety. Confirm that your setup operates within safe limits.
Start your engine under controlled conditions to check for anomalies in boost pressure, response, or temperature. Use diagnostic tools and software to monitor engine performance and make necessary adjustments. This step helps you identify potential issues before driving under demanding conditions.
Routine safety checks ensure all components stay securely in place. Confirm that your engine management system has been correctly reprogrammed and that there are no air leaks in the induction system.
Verify correct sensor readings and incorporate any physical modifications into your tuning processes. This guarantees a balanced and safe performance upgrade for your engine.
Additional Performance Upgrades and Resources
Once you're confident with forced induction, explore further upgrades like engine rebuilds to fine-tune power output. A gradual, tailored approach ensures performance matches your driving style.
Stay current by joining forums, workshops, and tuning communities. Hands-on learning sharpens skills and deepens understanding of vehicle performance.
With careful planning and testing, you’ll achieve reliable, lasting upgrades. Use these tips to complete your build and elevate your driving experience.